 Are you dealing with a troublesome HP laptop? Has it suddenly slowed down, overheated, or even refused to turn on? Don't worry; we've got you covered. This comprehensive repair guide will explore various methods for reviving your HP laptop and getting it back in action. We'll discuss essential tools, diagnostic techniques, and solutions for common issues that plague HP laptops. Then, with our step-by-step guide to laptop repairs, you'll be well-equipped to tackle your device's problems and get it running like new again. Recognizing Common HP Laptop Issues Overheating and Performance Declines Over time, your HP laptop may overheat, leading to slower performance or unexpected shutdowns. Dust accumulation, fan malfunctions, and worn-out thermal paste can cause these issues. Power and Charging Problems Laptops sometimes develop problems with their charging systems. Your HP laptop must be charging or holding a charge, or it may fail to turn on even when connected to a power source. Faulty power adapters, damaged batteries, or issues with the laptop's internal power components can be the culprits. Display and Screen Issues Cracked screens, flickering displays or lines across the screen can frustrate any laptop user. These issues can arise from accidents, manufacturing defects, or regular wear and tear. Essential Tools for HP Laptop Repairs A successful laptop repair often depends on having the right tools for the job. Here are some essential items you'll need for most repairs:
Step-by-Step Guide to Troubleshooting and Repair Step 1: Initial Assessment First, assess the issue and determine if it's something you can fix. Software-related problems, such as viruses or outdated drivers, can be resolved using antivirus programs or updating your drivers. However, hardware issues may require opening your laptop and replacing parts. Step 2: Backup Your Data Before attempting laptop repairs, backing up your important files and data is crucial. If your laptop is functional enough to transfer files, use an external hard drive or cloud storage to protect your data. Step 3: Diagnose the Problem Try to identify the root cause of the problem. Then, use online resources like HP's support website and forums to gather information on your issue. Step 4: Disassemble Your Laptop Please turn off your laptop and disconnect all power sources. Next, disassemble your device using an HP service manual for your specific model. Take photos of each step to help you reassemble your laptop later. Step 5: Perform the Repair Based on your diagnosis, perform the necessary repair. This may involve cleaning internal components, replacing faulty parts, or applying new thermal paste. Step 6: Reassemble and Test After completing the repair, reassemble your laptop, reconnect it to a power source, and test its functionality. Ensure your issue has been resolved and your laptop is running smoothly. When to Seek Professional Help 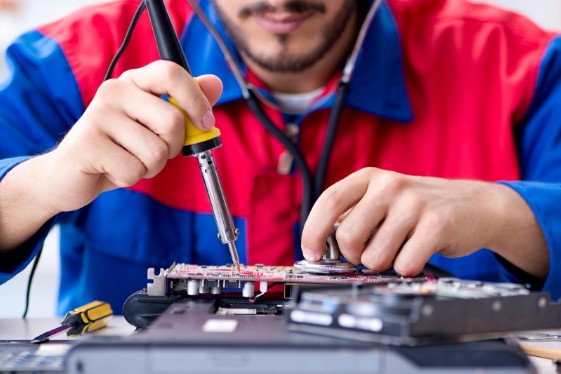 While DIY laptop repairs can save you money, there are times when professional assistance is necessary. For example, if you're uncomfortable opening your laptop or need clarification on the problem, it's best to consult an expert. Also, contact HP support for guidance or service if your computer is still under warranty.
Conclusion Laptop repairs can be intimidating, but with a comprehensive guide like this, you'll be well-prepared to tackle the most common HP laptop issues. You can successfully revive your HP laptop and extend its lifespan by recognizing the symptoms, gathering the essential tools, and following our step-by-step troubleshooting guide. Remember, if you need clarification on a repair or your laptop is under warranty, it's best to consult an HP professional. But with the right resources, patience, and technical know-how, you'll be well on your way to restoring your HP laptop to peak performance. Happy repairing!
0 Comments
Leave a Reply. |