 We've all been there. It's that heart-stopping moment when your beloved cell phone slips from your hand and plunges into a sink full of water, or worse, a swimming pool or toilet. But what does water damage mean for your device? Is it a death sentence, or can it be brought back to life? In this blog post, we'll dive deep into understanding the implications of water damage on cell phones and whether a complete restoration is possible. We'll equip you with essential knowledge that could save your device and wallet from unnecessary despair. So, let's get started! Understanding Water DamageWater is one of the biggest enemies of electronics, and cell phones are no exception. Water can wreak havoc on a device in several ways, whether it's from a spill, a dip in the pool, or even high humidity. The primary concern is short-circuiting, which occurs when water bridges electronic connections that aren't meant to intersect. This can cause immediate and unpredictable behavior. Furthermore, corrosion can occur over time, leading to long-term damage that may gradually degrade the phone's performance. Symptoms of Water Damage So, how do you know if your phone has been water-damaged? Here are a few signs:
Remember, even if your phone seems to be working fine right after getting wet, latent damage can occur days or even weeks later. The Path to Cellphone RepairNow comes the question – is it possible to restore a water-damaged cell phone? The answer depends on several factors, including the extent of the damage, how long the phone was exposed to water, and the speed at which you act. The first step is to power off the device immediately and remove any removable parts, like the SIM card or memory card. Then, if you're tech-savvy, you can attempt to dry the internal parts using silica gel or synthetic drying agents. However, we strongly recommend seeking professional help for a thorough, safe cellphone repair. Professional technicians have the necessary tools and knowledge to assess and treat the damage properly. The Possibility of Full Restoration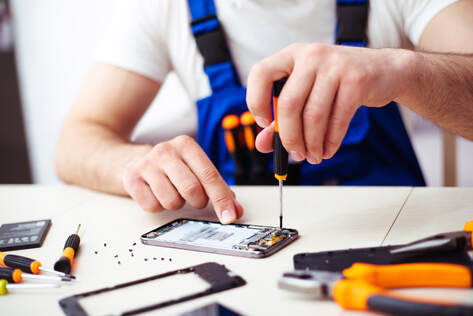 Can a water-damaged cell phone be fully restored? Well, it's a case-by-case situation. We've seen phones that bounced back perfectly after a quick dip and others that were beyond repair after a thorough soaking. The key takeaway here is that there's always a chance. Even if the device can't be fully restored, data recovery will likely save you from losing precious photos, contacts, and messages. Prevention: The Best CureOf course, the best way to deal with water damage is to prevent it in the first place. Consider investing in a waterproof case and avoid exposing your device to water as much as possible. Be mindful of where you place your phone, especially around liquids. ConclusionUnderstanding the implications of water damage on your cell phone and the steps to mitigate its effects could be the difference between a functional phone and an expensive paperweight. It's essential to remember that while some remedies can be applied at home, professional cellphone repair service is the most reliable path to restoration.
If you need a cellphone repair service, don't hesitate to contact the experts at Cellphone Repair Solutions. We'll do everything we can to bring your device back to life.
0 Comments
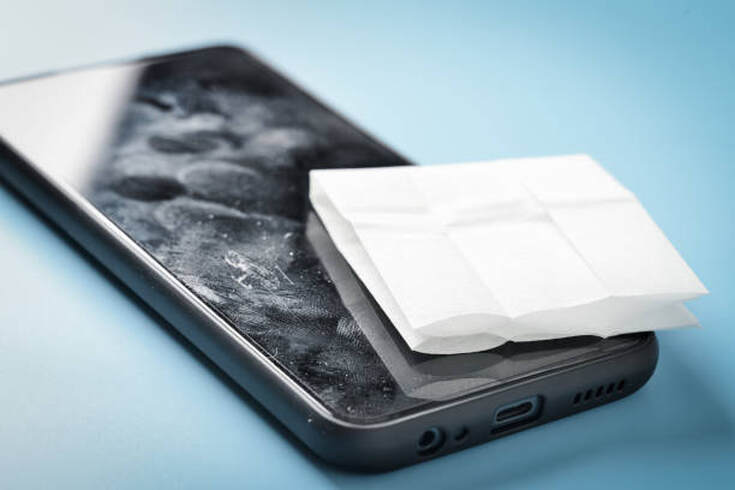 One of the major reasons leading to screen replacement in smartphones is not just a fall or hard impact but something as seemingly innocuous as inappropriate cleaning methods. Many are unaware that how they clean their phones is damaging their screens. Indeed, inappropriate cleaning methods could be termed as the silent killer of phone LCD screens. Understanding LCD ScreensBefore diving into the details, it's vital to understand the delicate nature of LCD screens. Your phone's LCD screen is more than just a piece of glass. Its complex structure comprises multiple layers, including the outer glass, a touch-sensitive digitizer, the actual liquid crystal display, and a backlight. Each layer is precisely engineered, and any harsh or improper treatment can cause irreversible damage. The Danger of Household Cleaners Household cleaners may seem like the ideal solution for a grimy phone screen, but they're often far from it. Many contain harsh chemicals like ammonia or alcohol, which can strip away the protective coatings on your LCD screen, leaving it vulnerable to damage. Using these cleaners can result in a reduction in touch sensitivity and an increase in susceptibility to scratches and ultimately lead to the necessity of a screen replacement. Using Household Cleaning AgentsHousehold cleaners, while excellent for disinfecting surfaces or dealing with kitchen stains, can wreak havoc on your phone's LCD screen. Many cleaning agents contain harsh chemicals like ammonia or alcohol. These substances can strip away the oleophobic (oil-repellent) and hydrophobic (water-repellent) coatings that manufacturers apply to LCD screens. These coatings are essential for keeping your screen smudge-free and touch-responsive. Without them, your screen could become more susceptible to scratches and other damage. Wet Wipes and Baby WipesAnother safe but potentially harmful cleaning option is baby wipes or wet wipes. Although they may seem soft and harmless, the liquids impregnated in the wipes can be just as harmful as household cleaning agents. They can leave behind a residue that, over time, can degrade the screen quality and touch sensitivity. The Perils of Improper Cleaning Techniques Improper cleaning techniques can pose significant risks to your phone's LCD screen. Rubbing the screen with rough materials like paper towels or napkins can cause scratches and pixel damage. Additionally, over-saturating the screen with cleaning solution or water can lead to liquid seeping into the edges and potentially damaging internal components, making proper cleaning techniques essential to avoid costly screen replacements. Rubbing and ScratchingUsing the wrong materials to clean your phone can also lead to damage. Paper towels, napkins, or rough cloth can scratch your LCD screen. Even rubbing a smudge too hard can cause problems. LCD screens are sensitive, and undue pressure can lead to pixel damage or colour distortions. Over-saturationDrenching your phone screen in a cleaning solution, or even water, can be a grave mistake. Excess liquid can seep into the edges of the screen, potentially damaging the LCD or other internal components. The water damage could also void your warranty, leading to costly screen replacements or repairs. Proper LCD Screen Cleaning Techniques To keep your LCD screen in top shape, follow these safer cleaning methods: Use a Microfiber Cloth: Microfiber cloths are soft, non-abrasive, and excellent for cleaning LCD screens. They can effectively remove dust, fingerprints, and smudges without scratching the screen or removing protective coatings. Specialized Screen Cleaners: Consider using a specialized screen cleaning solution if a dry microfiber cloth isn't doing the trick. These are formulated specifically for electronics and won't harm your LCD screen. Gentle Motion: When cleaning, always use a soft, circular motion. Avoid applying too much pressure, as this can damage the screen. ConclusionTo wrap things up, cleaning your phone's LCD screen is essential, but it's equally important to do it correctly.
By avoiding inappropriate cleaning methods, you can extend the life of your LCD screen and save yourself from unnecessary screen replacements. Being mindful of these cleaning tips can ensure your phone screen remains clean, clear, and fully functional.  Regular maintenance is vital for keeping your PC and Mac Book laptops running smoothly. Proper maintenance not only ensures optimal performance but also extends the lifespan of your device. This blog post will share essential maintenance tips tailored to Apple repair laptops. Following these tips, you can keep your computer in excellent condition and avoid potential issues. Keep It Clean: The Importance of Regular DustingDust and debris can accumulate over time, clogging vents and compromising your laptop's cooling system. This can lead to overheating and decreased performance. To prevent this, make sure to dust your computer regularly. Use a soft, lint-free cloth or a can of compressed air to clean the keyboard, ports, and vents gently. Be careful not to apply excessive pressure or use liquid cleaners, as they can damage your device. Protect Your Laptop with a Reliable Case Whether carrying your laptop or sitting on your desk, protecting it from accidental bumps and scratches is essential. Invest in a high-quality laptop case or sleeve to shield your device from daily wear and tear. Look for cases specifically designed for Apple laptops, ensuring a snug fit and easy access to ports and buttons. Update Software and Operating System RegularlySoftware updates often include necessary security patches and bug fixes that enhance your laptop's performance and protect it from potential vulnerabilities. Set your computer to install or manually check for updates regularly and automatically. Additionally, keep your operating system up to date, as Apple frequently releases new versions with improved features and security enhancements. Optimize Storage SpaceA cluttered hard drive can significantly impact your laptop's speed and overall performance. Take the time to declutter your storage regularly. Start by removing unnecessary files, uninstalling unused applications, and emptying the trash bin. Consider transferring large files and documents to an external hard drive or cloud storage to free up space and improve your laptop's responsiveness. Practice Safe Browsing HabitsProtecting your laptop from malware and viruses is crucial for its smooth operation. Avoid downloading files or clicking on suspicious links from untrusted sources. Install reliable antivirus software specifically designed for Apple devices and keep it updated. Regularly scan your laptop for potential threats and perform necessary actions to secure your device. Battery Care and Charging Practices To maintain optimal battery performance, it's essential to follow good charging practices. Avoid letting your battery drain completely before recharging, as it can shorten your lifespan. Instead, aim to keep your battery level between 20% and 80% for regular use. If you plan to store your laptop for an extended period, charge the battery to around 50% before turning it off. Keep Your Laptop CoolHeat is the enemy of electronic devices, and laptops are no exception. Excessive heat can cause damage to internal components and affect overall performance. Ensure proper ventilation by using your laptop on a hard, flat surface. Avoid placing it on soft surfaces like beds or couches that can block airflow. Additionally, consider investing in a laptop cooling pad to enhance heat dissipation. ConclusionTaking care of your PC or Mac Book laptop is essential to ensure its longevity and optimal performance. Following these crucial maintenance tips tailored to Apple repair laptops, you can keep your device running smoothly for years.
Regular cleaning, software updates, storage optimization, safe browsing habits, battery care, and heat management are all key elements to incorporate into your laptop maintenance routine. Remember, a little effort today can save you from potential frustrations and costly repairs in the future. 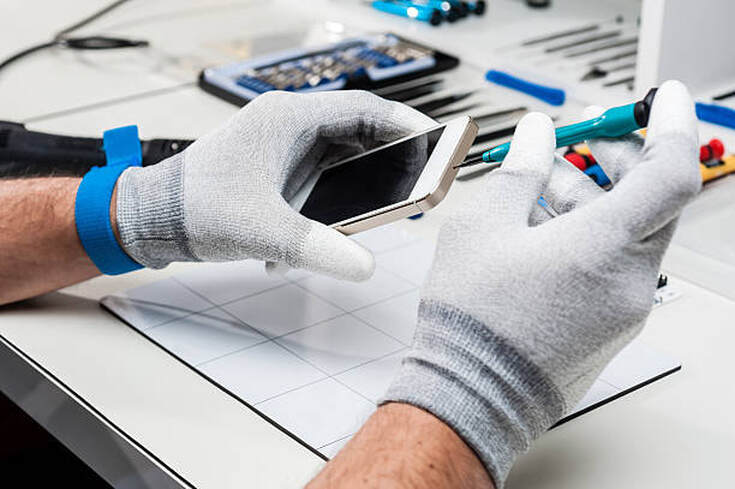 Our reliance on our cell phones, our trusty electronic companions, continues to grow as technology advances at a fast pace. Unfortunately, one of smartphone users' most dreaded issues is screen damage, leading to the often-misunderstood cell phone screen replacement process. However, several myths and misconceptions are swirling around this topic. So today, let's bust some of these myths and unveil the truths about screen replacements. Myth 1: Replacing Your Screen Is ExpensiveThe popular misconception is that replacing your smartphone screen is too costly. While costs can vary depending on the model and the extent of the damage, many affordable, high-quality services can help repair your screen. In fact, it's often significantly cheaper than buying a new device. Remember, when you invest in a high-end phone, you're not just paying for the screen but also for the phone's internal technology. As a result, screen replacement can give your phone a fresh lease of life without denting your pocket too much. Myth 2: All Replacement Screens Are the SameNot all replacement screens are created equal. A common myth is that any screen replacement will offer the same quality and durability. The truth, however, is that there's a broad spectrum of quality regarding replacement screens. Here's an example: screens made by the original equipment manufacturer (OEM) are created by the same company that produced your phone's original screen. This guarantees excellent compatibility and performance. On the other hand, aftermarket screens can vary significantly in quality. So, always ensure your service provider uses high-quality screens for replacements. Myth 3: You Can Only Get Your Screen Replaced At Your Phone's Manufacturer's Store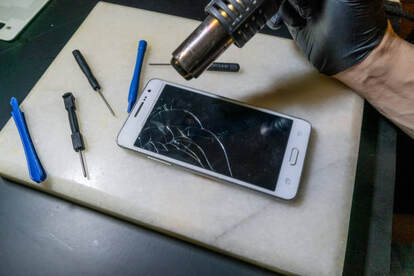 While replacing your screen at your phone's manufacturer's store is an option, it's not the only one. Many third-party service providers can do an equally good job, often at a lower cost. However, ensure they have positive reviews and offer a warranty on their work. Moreover, manufacturer stores can often take longer due to high demand, whereas local repair shops can often provide quicker service. Myth 4: Screen Replacement Will Void Your WarrantyWhile this is partially true, it's less cut-and-dry than many believe. Most phone warranties do not cover accidental damage, including broken screens unless you have purchased additional coverage. Therefore, if your screen is broken, your warranty might be less helpful. However, if you get your screen replaced by a third party during your warranty period, it could void your warranty for future issues. Therefore, it's essential to weigh your options before making a decision. Myth 5: A Cracked Screen Is Purely Cosmetic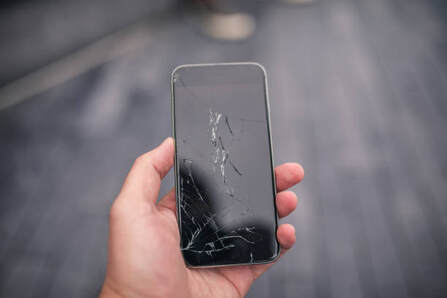 Lastly, many believe that a cracked screen is a cosmetic issue and doesn't affect the phone's functionality. This is a dangerous myth. A cracked screen can make your phone susceptible to other damage, including water damage and further breakages. In addition, handling small glass pieces can pose a safety hazard as they may cause cuts on your fingers. ConclusionIn conclusion, many misconceptions about cell phone screen replacements can lead people to make uninformed decisions. The key takeaway here is to keep these myths from clouding your judgment.
Instead, evaluate your options carefully and decide to restore your cell phone to its original glory. As always, prevention is the best cure. To avoid any possible harm, it's essential to use protective measures like phone cases and screen protectors.  In today's digital age, laptops have become indispensable tools for work, communication, and personal tasks. However, when these devices encounter issues or malfunctions, it disrupts productivity and poses a risk to data security and privacy. This blog post will delve into professional laptop repair services' vital role in safeguarding sensitive information, ensuring data security, and maintaining privacy. First, explore the critical aspects of professional laptop repair contributing to a secure, worry-free computing experience. Expert Diagnosis and RepairProfessional laptop repair technicians possess the knowledge and expertise to assess your device comprehensively. They can identify vulnerabilities, potential security breaches, and hardware or software-related issues that may compromise your data. Then, through their diagnostic process, they pinpoint the root causes of problems, ensuring that all necessary repairs are performed accurately and efficiently. Thorough Assessment of Laptop VulnerabilitiesProfessional laptop repair technicians possess the knowledge and expertise to assess your device comprehensively. They can identify vulnerabilities, potential security breaches, and hardware or software-related issues that may compromise your data. Then, through their diagnostic process, they pinpoint the root causes of problems, ensuring that all necessary repairs are performed accurately and efficiently. Secure Data Handling During RepairsData security and privacy are paramount during laptop repairs. Professional technicians follow strict protocols to protect your sensitive information throughout the repair process. In addition, they take precautions to ensure your data remains secure, including employing encryption measures, creating backups, and implementing secure data transfer methods. With their expertise, you can know that your valuable data is in safe hands. Trusted Software and Hardware SolutionsOne of the advantages of professional laptop repair services is their access to genuine and authorized components and software. Genuine parts ensure optimal compatibility and performance, minimizing the risk of security vulnerabilities that counterfeit or incompatible components may introduce. Similarly, licensed software installations and updates from trusted sources guarantee a secure computing environment and reduce the potential for malware or unauthorized access. Genuine Components and SoftwareOne of the advantages of professional laptop repair services is their access to genuine and authorized components and software. Genuine parts ensure optimal compatibility and performance, minimizing the risk of security vulnerabilities that counterfeit or incompatible components may introduce. Similarly, licensed software installations and updates from trusted sources guarantee a secure computing environment and reduce the potential for malware or unauthorized access. Security Patching and UpdatesKeeping your laptop's software up to date is essential for addressing security vulnerabilities. Professional repair services prioritize security patching and updates, ensuring your laptop's operating system and applications are fortified against the latest threats. By regularly applying patches and updates, technicians can mitigate security risks and enhance the overall security posture of your device. Data Recovery and Secure Disposal In cases where data loss occurs due to hardware failure, professional laptop repair services offer data recovery solutions. They employ specialized techniques and tools to retrieve and restore your valuable data from damaged or malfunctioning laptops. With their expertise, they can often recover files that may seem irretrievable, minimizing the impact of data loss on your productivity and peace of mind. Data Recovery SolutionsIn cases where data loss occurs due to hardware failure, professional laptop repair services offer data recovery solutions. They employ specialized techniques and tools to retrieve and restore your valuable data from damaged or malfunctioning laptops. With their expertise, they can often recover files that may seem irretrievable, minimizing the impact of data loss on your productivity and peace of mind. Secure Disposal of Old or Unrepairable LaptopsSecure disposal is crucial to protect your data when a laptop is beyond repair or becomes obsolete. Professional laptop repair services can ensure that your personal and business information is securely erased from the device, rendering it inaccessible to unauthorized individuals. In addition, they follow industry-standard data wiping methods to comply with privacy regulations and maintain the confidentiality of your data. ConclusionProfessional laptop repair services are vital in maintaining data security and privacy. Their expertise in diagnosing and repairing laptops and using genuine components and secure software solutions ensures your device is protected against security vulnerabilities.
Furthermore, with their focus on fast data handling, data recovery capabilities, and safe disposal of old laptops, they provide comprehensive solutions that safeguard your sensitive information. By entrusting your laptop repairs to professionals, you can enjoy a worry-free computing experience knowing that your data security and privacy are in expert hands. |